¶ Overview of Geofences
Geofences allow you to define an area on the map that you can use to receive Notifications when a vehicle assigned to the Geofence enters or exits the Geofence area.
Common uses for Geofences are entirely up to you but can include:
- Ensuring a vehicle which is on loan is not driven outside an agreed area
- Alerting when a secured and stored vehicle leaves its secure area
- Notifications when a vehicle arrives somewhere (work, home, school, etc)
¶ Automatic Geofences
All ImmoTrack Online GPS trackers come with an Automatic Geofence. Once you park your car and turn off the ignition, an implicit 50 metre radius geofence is created around your car. If the car moves outside of the geofence without the engine running, you will receive an Unauthorised Movement alarm notification on your phone (unless you have turned off this alarm type via the Notifications page.
¶ Creating your own Geofences
Geofences can be created by you in one of two ways:
- Quickly creating a 50-metre radius Geofence around where the vehicle is right now
- Manually creating a Geofence for a defined area (anywhere from metres in size to many kilometres)
¶ Creating a Geofence quickly
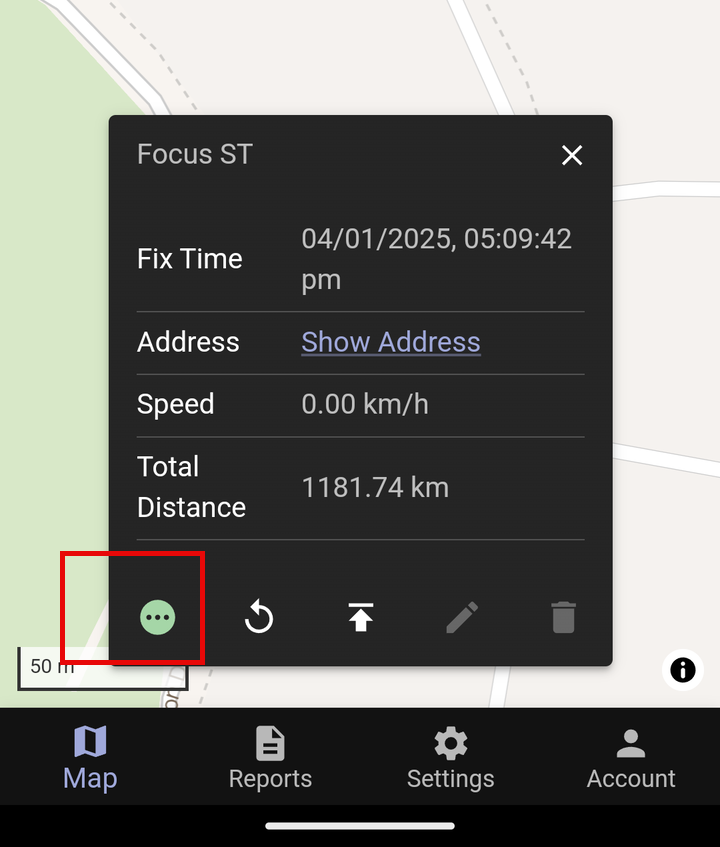
We describe this type of Geofence first because it is the best method for creating Geofences where your vehicle is regularly parked or stored. When you have a Device selected, you will see the ellipsis icon (three dots) in the bottom left, and when clicking this icon one of the options is “Create Geofence”.
When you select this option, this creates a circular 50 meter radius (100 metre diameter) Geofence around the current location of the Device and assigns the Device to this Geofence. These Geofences are useful for automatically defining a small area around your Device, such as for the home location of a vehicle, and are very useful for vehicles which are parked for extended periods of time and you need to know if the Device moves outside of the Geofence.
After this type of Geofence has been created, you can use it just like any other Geofence and assign it to other vehicles as well!
To create a Geofence automatically, select your Device on the Map, and then click the Ellipsis icon:
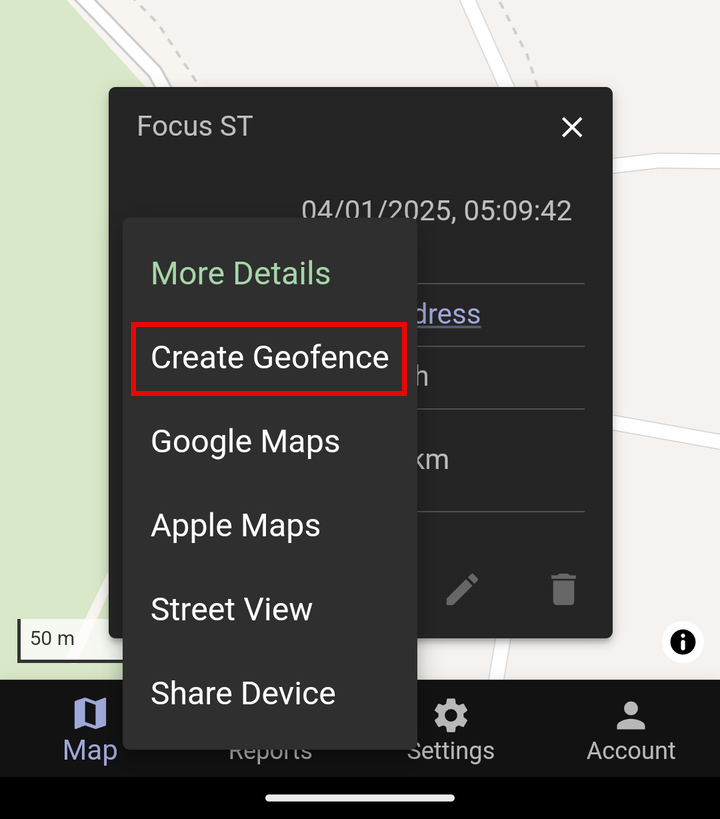
Next, select “Create Geofence”.
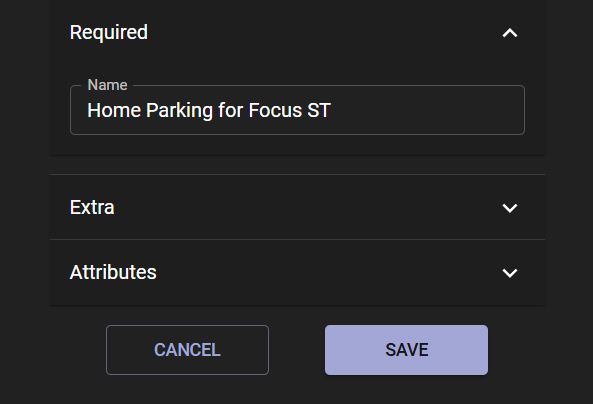
Lastly, give the Geofence a name and click “Save”. You do not need to add details under the Extra or Attributes sections.
The Geofence for this device's location - with a circular 50 metre radius around it - is now created and applied to this Device. You can now edit your Notifications for this Device so that you are notified when it leaves or enters the Geofence area.
¶ Creating a Geofence manually
Manually created Geofences are defined as Shapes or Lines. Geofences in a shape cover an area, whereas Line Geofences are used to enforce a driving route, and generate alerts if a vehicle deviates from that route. We find this a little excessive so we will cover it last.
Regardless of your shape type, you can either draw the shape or import one ready-made from a GPX file.
¶ Creating the Geofence
¶ Accessing the Geofence menu
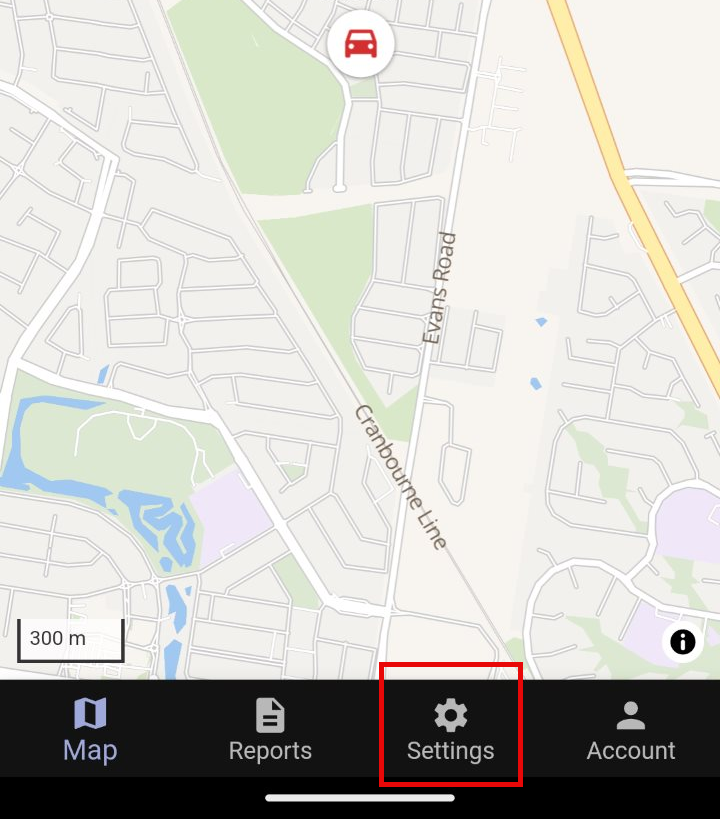
Regardless of whether you want to create a Line Geofence or a Shape Geofence, start by opening the ImmoTrack GPS Mobile App and clicking on the Settings option at the bottom of the screen.
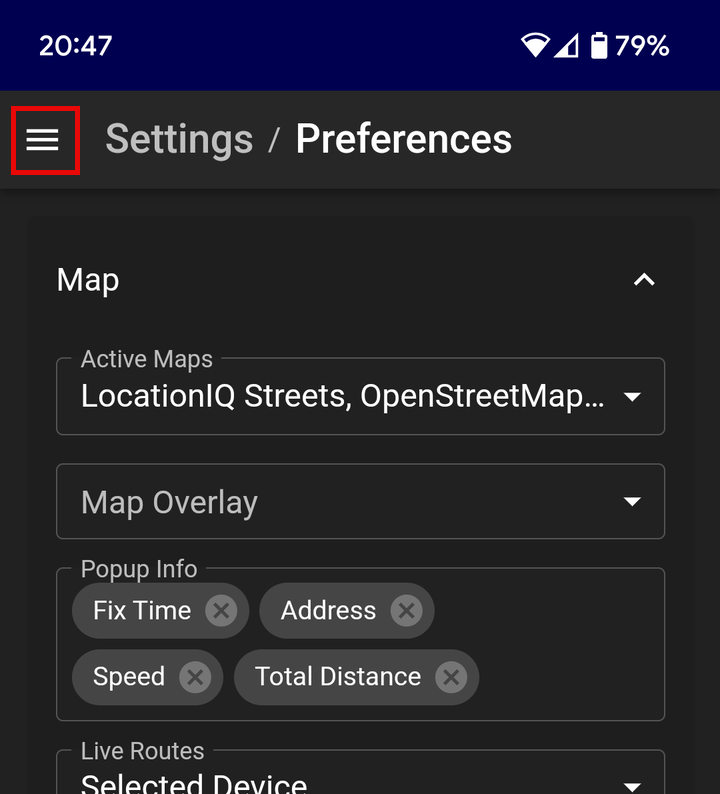
This will take you to the Settings / Preferences page. Click the three horizontal lines at the top left to bring up the entire Settings menu.
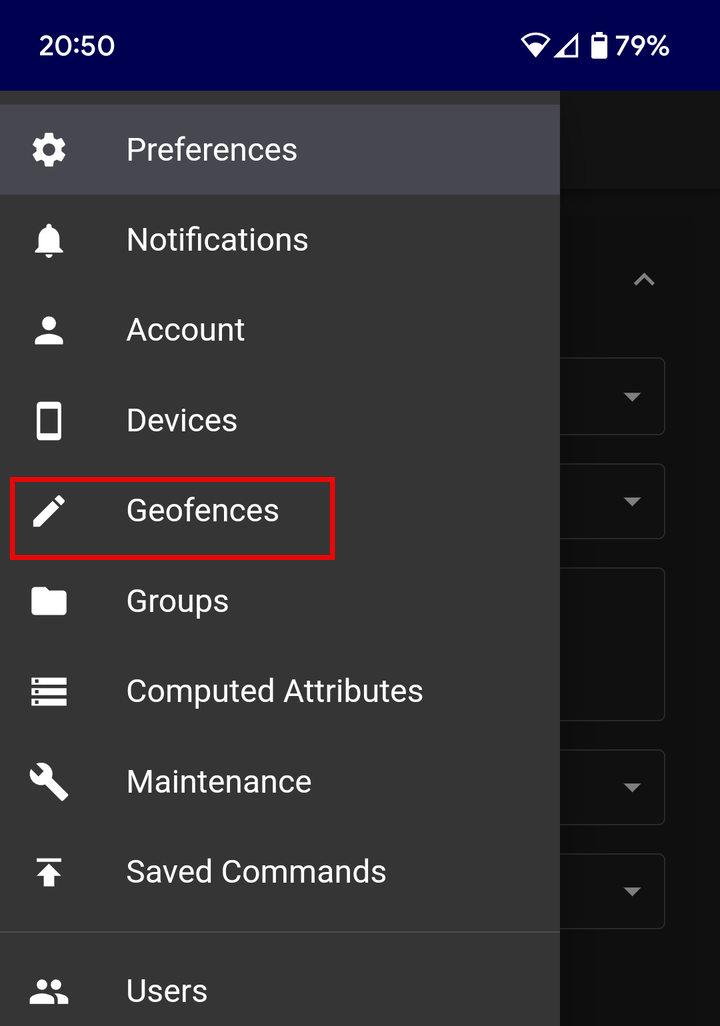
From the menu that appears, select Geofences.
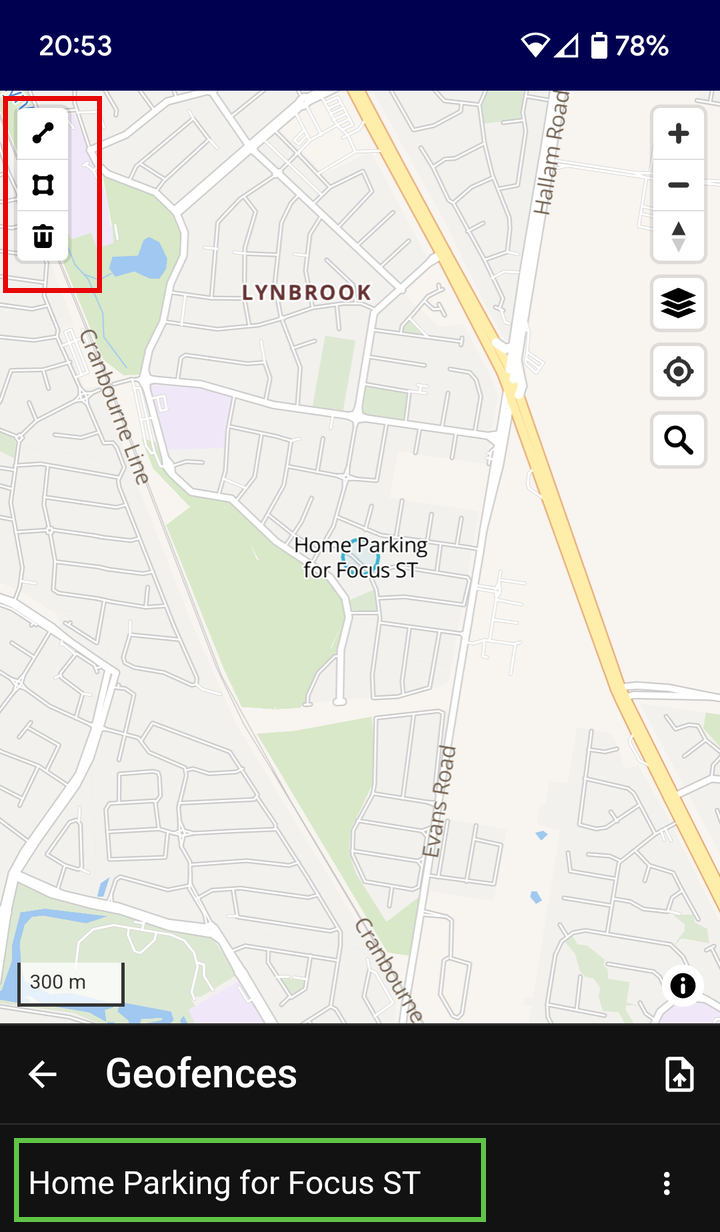
You are now in the Geofences page, and can create a new Geofence or edit an existing Geofence. The screen shows existing Geofences at the bottom, and allows you to create a Line or Shape by clicking the corresponding icon in the top left of the screen.
Note that existing Geofences are shown below highlighted in green, and the option to create a new Geofence is highlighted in Red.
¶ Drawing the Geofence
We will use Shape Geofences as our example here. In the top left of the screen click on the “Shape” icon as shown below and make sure that the icon turns slightly grey to indicate that it has been selected.
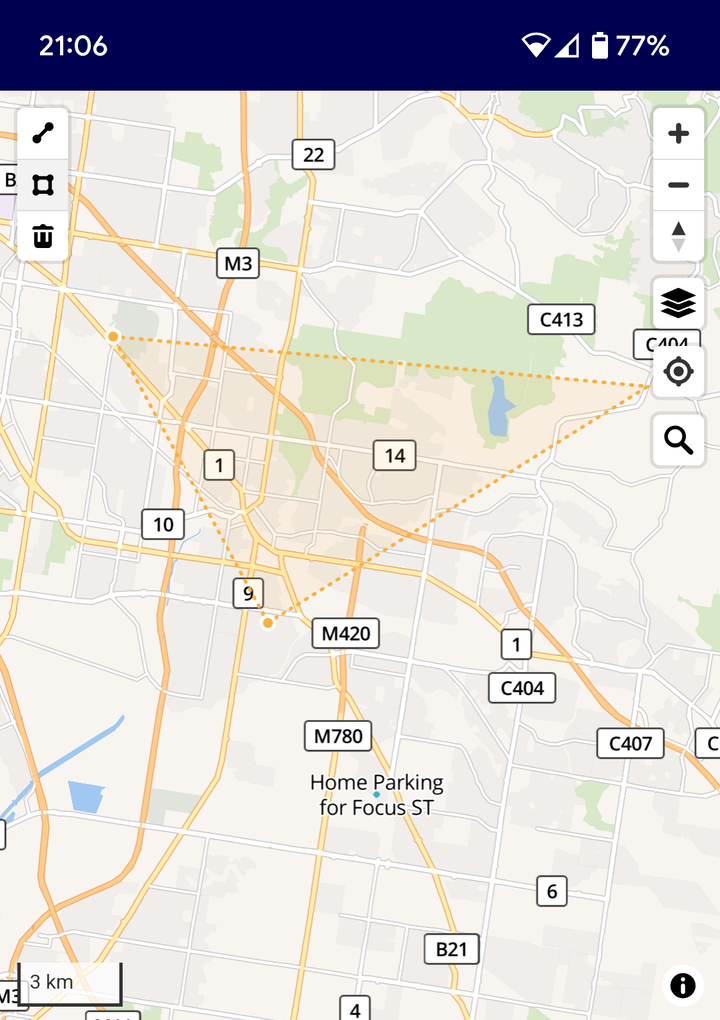
Next, click on your map to select the points that mark the edges of your Geofence. Once you have created at least three points, the Geofence will “fill in” and become a filled shape. Keep clicking on the map to add points to create as complex or as large a shape as you need. The example below shows a simple triangle shape.
IMPORTANT! To save your new Geofence, you must click the other type of Geofence icon. If your Geofence is a shape, you must click the Line button. This will trigger saving of the Geofence.
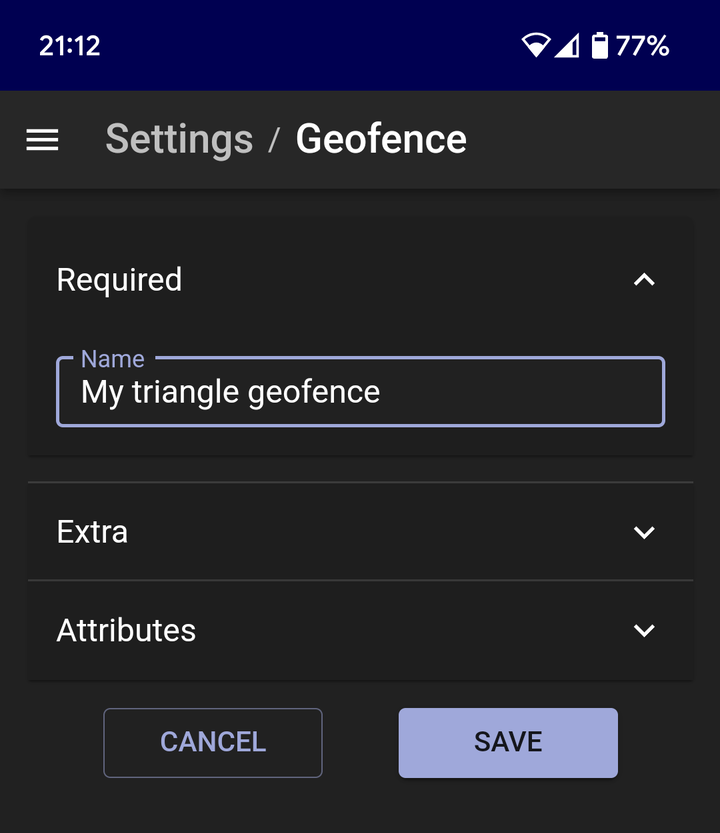
Give the Geofence a name, and click Save.
This geofence is now saved and ready to be assigned to Devices!
¶ Manul Geofence types
¶ Shape Geofences
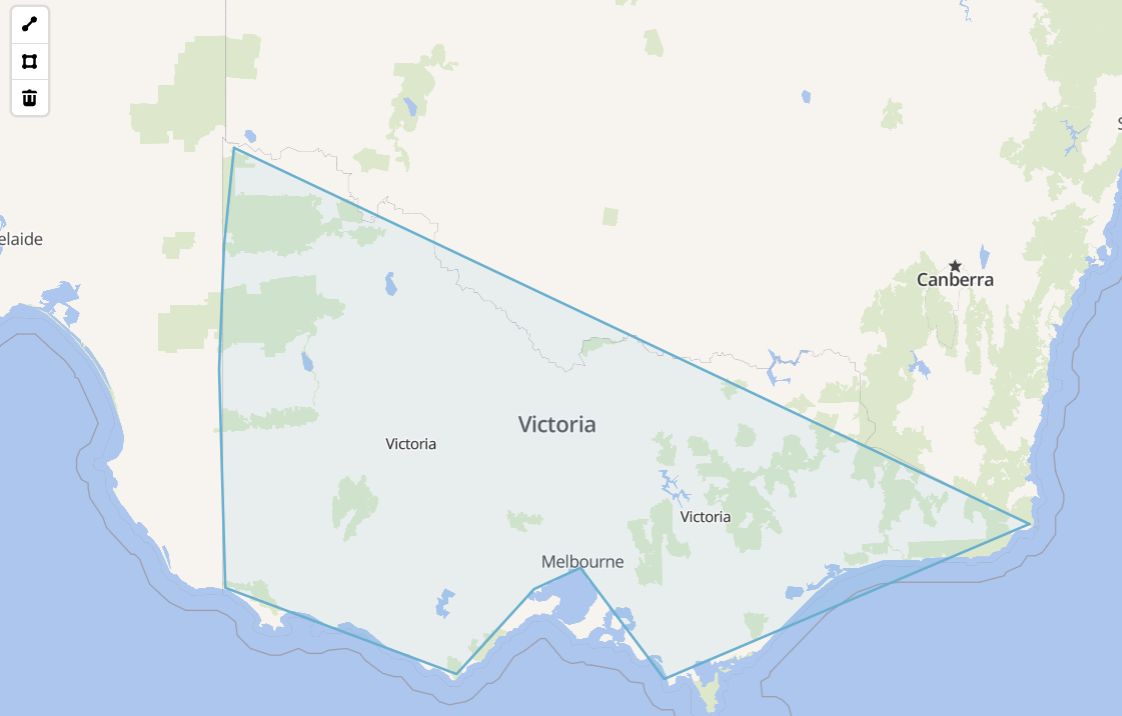
Geofences made in a shape cover an area that you wish to be notified about if a vehicle enters or leaves this area. Your Geofence can be huge; here's one rughly covering all of Victoria.
Your shape can be as simple as a triangle, a square, or hugely complex.
¶ Line Geofences
A line geofence is analagous to what might be called a “Track” in a GPS navigator used for bushwalking. In the ImmoTrack Online service, it allows you to define a Geofence which is essentially a route which a vehicle must follow, and alerts will be generated if the vehicle deviates any more than 25 metres off the assigned route.
We avoid discussing Line Geofences on this page due to their rare use, and will discuss these in the Advanced Configuration section of the Wiki.
¶ Assigning Geofences
Once a Geofence has been created, it can be assigned to one or more Devices.
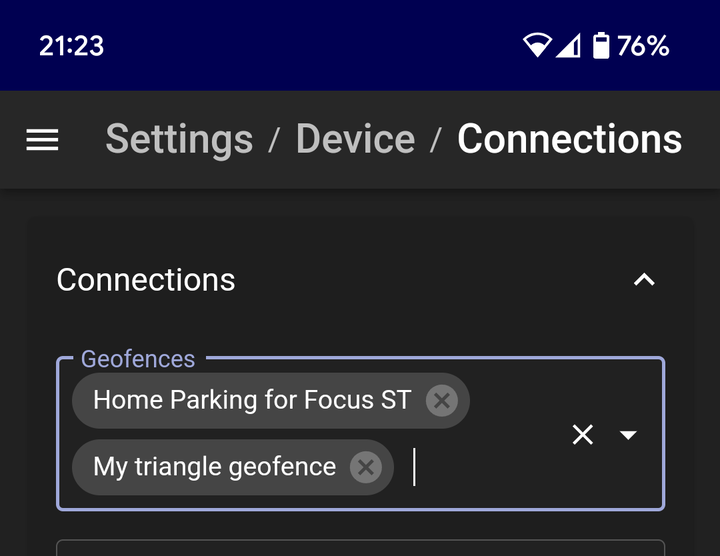
Assigning a Geofence to a Device is performed by opening the Connections settings for that Device, selecting the Geofences field, and clicking on the Geofence you wish to assign to the Device. In the example below, this Device already has the Geofence named “Home Parking for Focus ST” assigned, and we need to click on the “My triangle geofence” to also assign this Geofence to the Device.
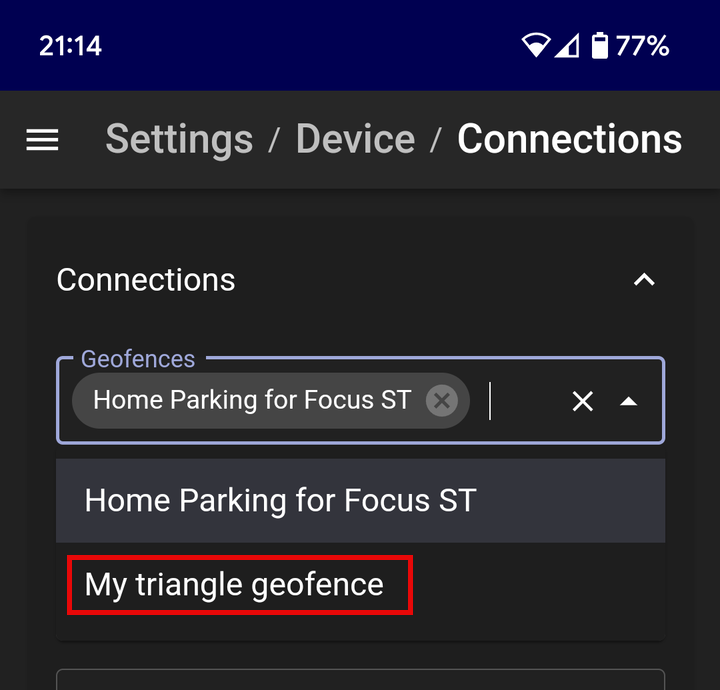
Once we have clicked on it, this additional Geofence will appear as assigned to the Device.
No further action is necessary; any changfes to the “Connections” settings for a Device are automatically applied. You can now work on configuring your Notification settings for this Device, related to when it enters or exits a Geofence.
¶ Deleting Geofences
If you no longer need a Geofence, you may delete it.
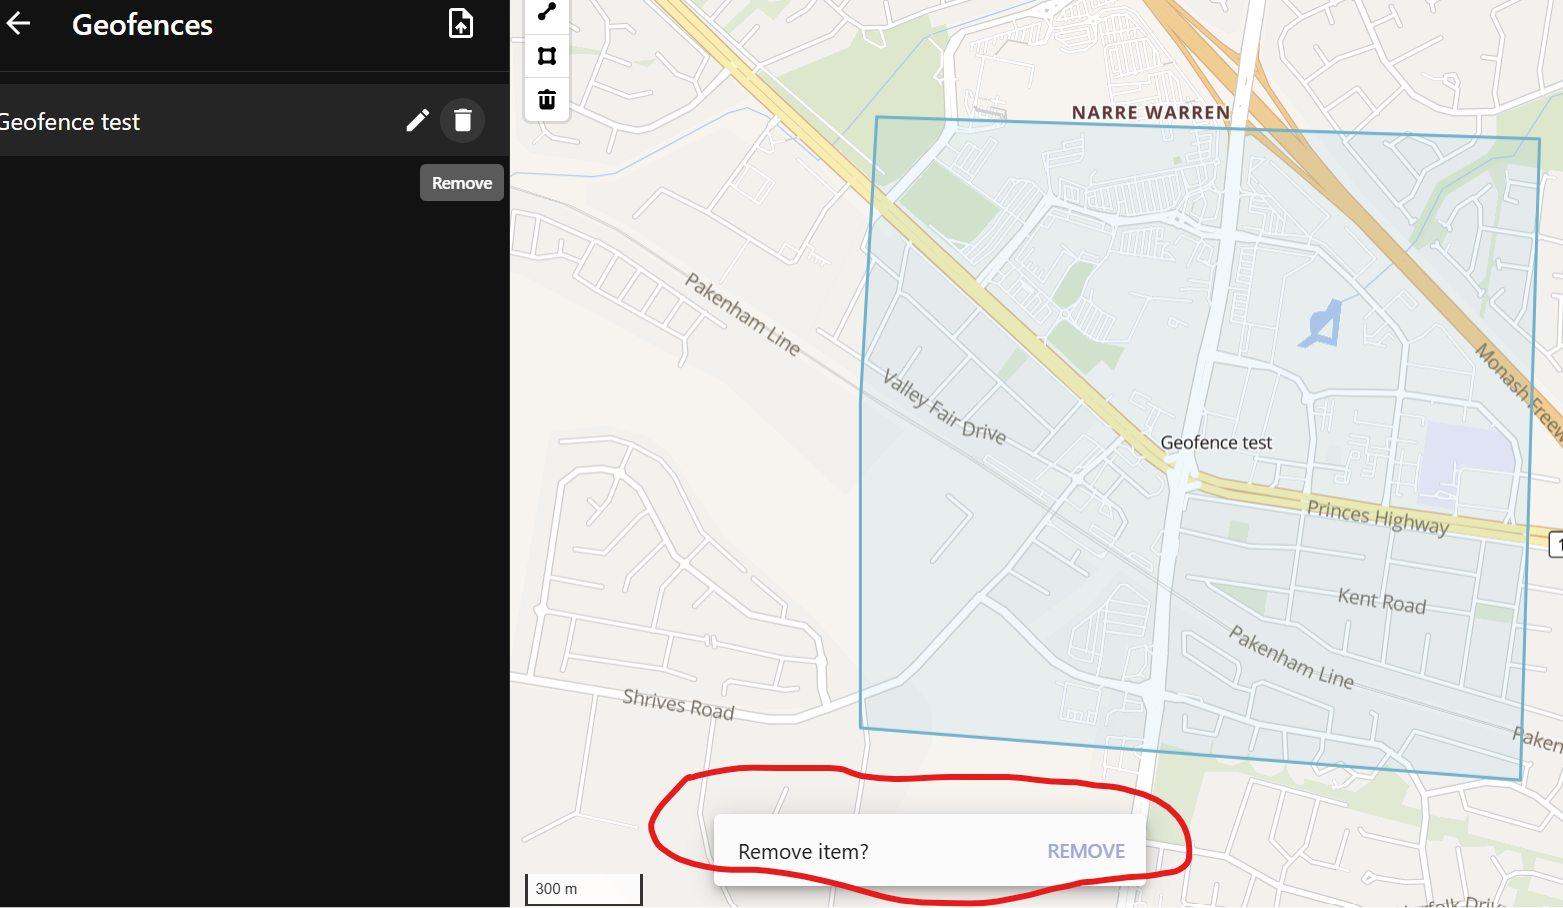
See the web browser example below. To delete the Geofence, click the Trash icon next to the Geofence name on the left of the screen, and then click the “Remove” link at the bottom of the screen.